


How to Seal Your New Drive in Repton
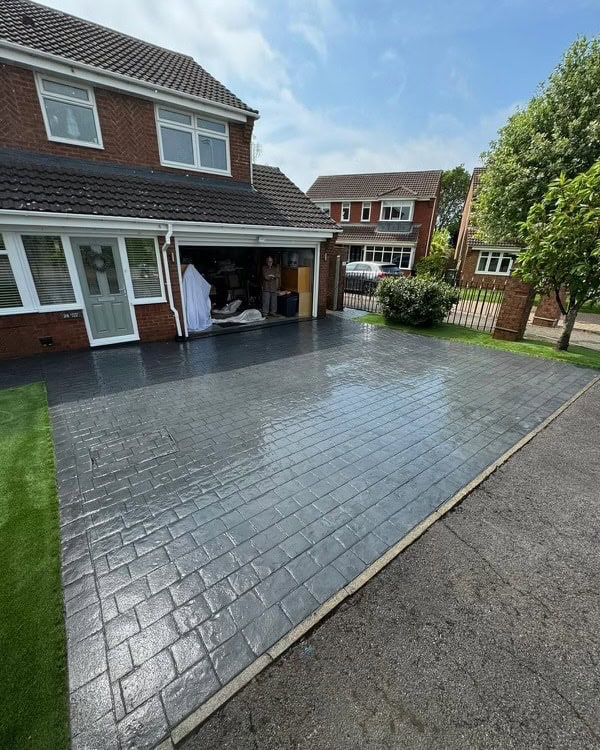
Sealing a new driveway is one of the most effective ways to protect your investment and maintain the appearance of your property. In a picturesque village like Repton, where homes often carry historic charm and well-tended kerbsides are the norm, having a pristine and durable drive is a point of pride. Whether you’ve opted for block paving, resin-bound stone, or concrete, sealing helps lock in that freshly installed look while defending against weather, wear, and weeds.
If you’ve recently had a driveway installed in Repton and you’re wondering how to go about sealing it properly, this guide will take you through the process from start to finish. We’ll cover timing, preparation, product selection, application, and aftercare – all with a focus on the unique conditions and considerations that come with living in this part of Derbyshire.
Why Sealing Your Driveway Is Essential
Repton, known for its historic buildings and leafy streets, is subject to typical British weather – frequent rainfall, occasional frost, and the occasional blast of sunshine. All of these can take a toll on your new drive if it’s left unsealed. Water can seep into the joints or surface, leading to moss and algae growth, freeze-thaw damage in winter, and a slow deterioration of materials over time.
For block paving in particular, sealing prevents colour fading caused by UV exposure and stops weeds and moss from establishing in the joints. If your drive is resin-bound, sealing isn’t always required, but some installers recommend a top-up sealant every few years to preserve the surface’s non-porous qualities. Concrete drives also benefit significantly, as a good sealant prevents staining from oil leaks or tyre marks, which can be difficult to remove once embedded.
In Repton, where house-proud homeowners keep their properties in good order and many of the roads and lanes are subject to drifting soil and leafy debris, a sealed driveway not only stays cleaner for longer but also helps your property stand out for all the right reasons.
When to Seal a New Driveway
Timing is crucial when it comes to sealing a new driveway. Apply sealant too early, and you risk trapping moisture or interfering with the curing process of the materials. Leave it too long, and your driveway may already have begun to deteriorate or stain, making it harder to achieve that pristine finish.
Generally, most professionals recommend waiting at least four to six weeks after installation before sealing block paving or concrete. This allows time for any efflorescence – the white salt deposits that sometimes rise to the surface – to naturally work its way out. For resin-bound driveways, your installer may advise a different timescale or suggest whether a sealant is necessary at all, as these surfaces are already bound tightly with resin and have built-in resistance to moisture.
The key is to choose a dry period with no rain forecast for at least 24 hours and daytime temperatures consistently above 10°C. This makes spring and early summer an ideal time for sealing in Repton, although you can also seal in early autumn provided the weather cooperates.
Preparing the Surface for Sealing
Before you open a tin of sealant, your driveway must be thoroughly prepared. No sealant will adhere properly to a surface that’s dirty, damp, or contaminated with algae, oil, or debris. Proper preparation is what ensures the sealant bonds well and delivers a long-lasting, even finish.
The first step is to sweep the driveway clean using a stiff-bristled broom. You’ll want to remove all loose dirt, leaves, twigs, and gravel. If your drive is block paved, pay particular attention to the joints between the blocks, as this is where moss or wind-blown seeds tend to collect.
Once the loose debris is removed, a pressure wash is often necessary to eliminate ingrained dirt and any biological growth. In Repton, where many driveways are surrounded by hedging or trees, this is especially important, as shaded areas tend to harbour moss and mildew. After washing, allow the driveway to dry completely. This could take 24 to 48 hours depending on the weather and the porosity of the material.
If you’re sealing block paving, now is the time to refill any lost kiln-dried sand between the joints. This sand helps lock the blocks in place and prevents shifting over time. Use a dry brush to work the sand into the joints and ensure it sits level with the surface.
Choosing the Right Sealant
Not all sealants are created equal, and the best choice for your drive depends on the material and the finish you want to achieve. In the UK, sealants come in both solvent-based and water-based varieties. Solvent-based options tend to provide a glossier finish and are more durable, but they also emit strong fumes and must be handled with care. Water-based sealants are lower in VOCs (volatile organic compounds) and are often easier for homeowners to apply themselves.
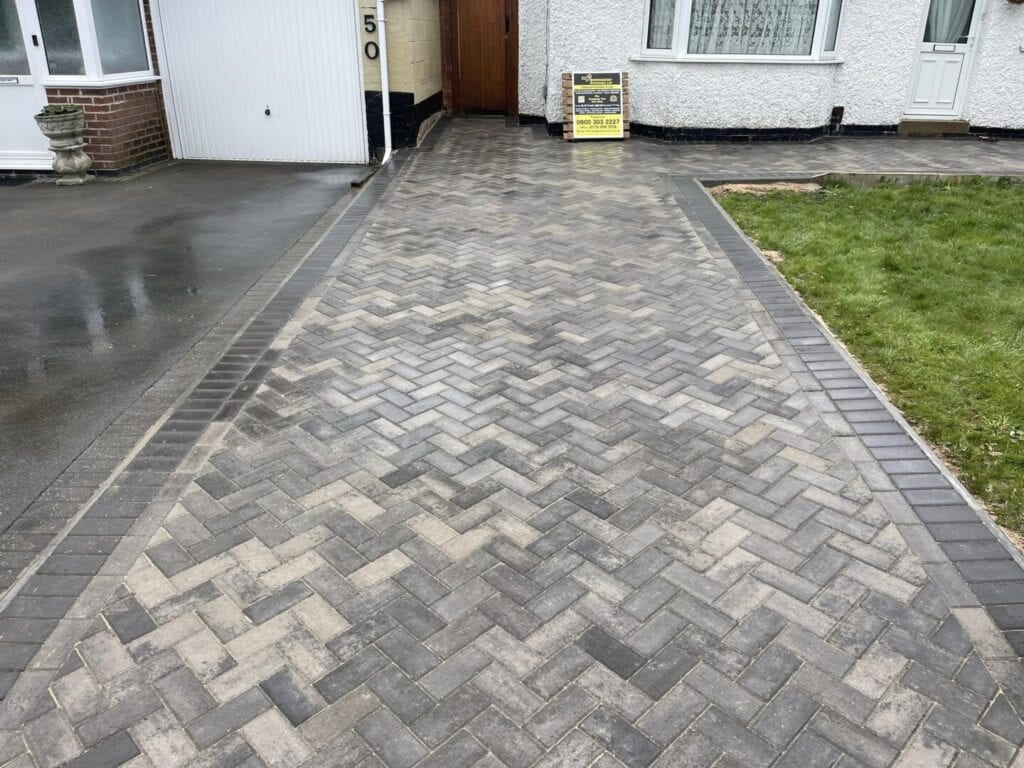
For block paving in Repton, acrylic-based sealants are a popular choice. They provide a semi-gloss finish, enhance the colour of the blocks, and create a protective film that resists stains and weeds. If your preference is for a natural matte finish, there are invisible sealants that penetrate the surface without changing its appearance, while still offering protection against water and grime.
Concrete driveways benefit from polyurethane or acrylic-based sealants that help prevent staining and discolouration. For resin-bound driveways, always check with your installer before applying a sealant, as not all products are compatible with resin surfaces and unnecessary sealing can sometimes cause issues.
It’s also wise to consider anti-slip additives if your driveway is on a slope or if safety is a concern. In Repton, where we do get icy mornings and damp weather, this can be a very practical choice.
Applying the Sealant
With the surface cleaned and fully dry, and your sealant chosen, it’s time for application. Most homeowners in Repton either apply the sealant themselves with a long-nap roller or hire a professional for larger or more complex driveways. If you’re going the DIY route, you’ll need a sealant roller tray, an extendable roller pole, and possibly a hand-held sprayer if you’re covering awkward corners or detailed edging.
Start by pouring a manageable amount of sealant into your tray. Work from one end of the drive to the other, applying an even coat and taking care not to let the sealant pool or streak. If your sealant is quick drying, avoid going back over areas that have already started to set, as this can create marks or uneven texture.
Two coats are usually recommended for best results, particularly with block paving. Allow the first coat to dry according to the manufacturer’s instructions – usually between two and four hours – before applying the second. The second coat locks in the finish and ensures full coverage. Once applied, the sealant will need to cure before you can drive or walk on it. This typically takes 24 to 48 hours.
Caring for a Sealed Driveway
Once sealed, your driveway should require less maintenance, but that doesn’t mean you can ignore it altogether. Regular sweeping and the occasional rinse will help prevent the buildup of dirt and organic matter, especially during the autumn months when leaves fall and start to break down.
In Repton, where many drives are bordered by hedgerows or trees, it’s a good idea to keep these trimmed back where possible to reduce the amount of leaf litter and shade, both of which can encourage moss growth. If you notice any weeds trying to push through the joints, remove them promptly before they get a foothold.
Over time, sealants will wear away due to traffic and weather. A good quality sealant should last between two and five years, depending on the material and use. When you notice water no longer beading on the surface, or if the colour starts to look dull, it’s likely time for a top-up coat.
Common Mistakes to Avoid
Sealing a drive isn’t difficult, but there are a few common pitfalls that can lead to poor results. The first is rushing the job – sealing a damp driveway or applying sealant in poor weather will almost always lead to bubbling, patchiness, or peeling. In a village like Repton, where local conditions can change quickly, it’s worth watching the weather forecast closely and being prepared to reschedule if necessary.
Another mistake is using the wrong type of sealant for your surface. This can result in poor adhesion, unwanted shine, or even damage to the materials. If in doubt, always consult your installer or seek advice from a trusted local supplier.
Applying too much sealant in one go can also lead to pooling or blotchy results. It’s better to apply two thin coats than one thick one. Finally, avoid walking or driving on the surface before it’s fully cured – doing so can leave marks that are difficult to remove.
Final Thoughts
Sealing your new driveway in Repton is one of the smartest things you can do to protect its appearance, structure, and value. With the right preparation and application, you’ll enjoy a surface that looks just as good in five years as it does today.
Whether your drive leads to a period cottage in the heart of the village or a modern home on the outskirts, a well-sealed surface reflects care and attention to detail – qualities that are very much part of Repton’s charm. And with proper aftercare, you’ll be rewarded with a driveway that stays cleaner, resists wear, and adds lasting appeal to your home.
Contact the team at Pavemaster Driveways for a free quote on your driveway.